Once you have registered on the researcher platform, you can start creating your study design. In this video we will tell you how to do this.
*The option for mandatory CAB assessment at the time of participant enrollment is no longer used.
Read more about how to start your research in this article.
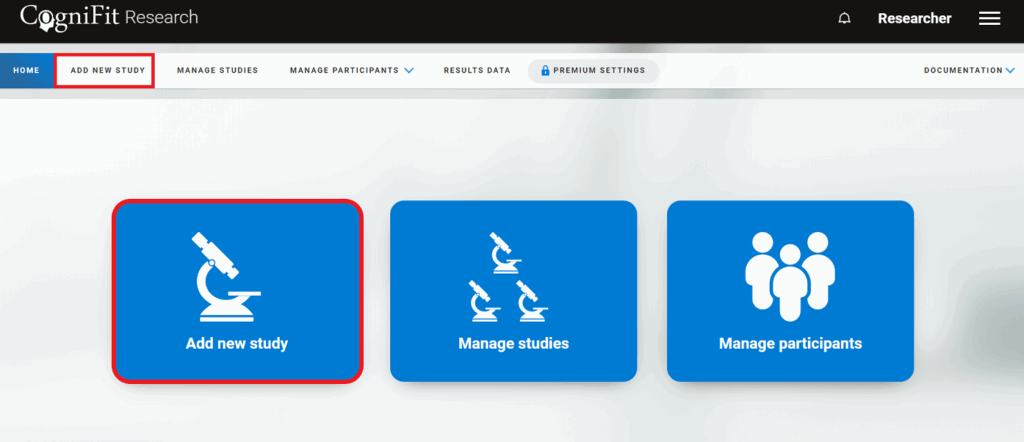
1. Go to your researcher account and on the home page click on “Add New Study” in the center of the screen or the top bar menu.
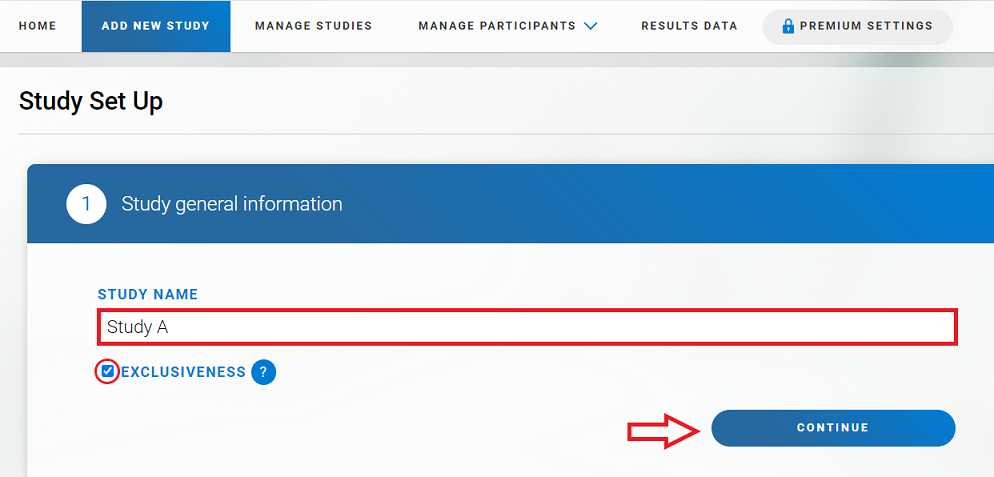
2. On the page that opens, Name your study. To do so, enter the name of the study in the “Study Name” line. Please note that the name provided will be visible to participants who wish to enroll in your study.
Attention: Specify whether you want your study to be exclusive or not. Exclusivity will not allow users who are already participating in other studies to participate in your study, nor will it allow your your participants from participating in other studies. To make a study exclusive, click and select the checkbox below its name.
Click on Сontinue.
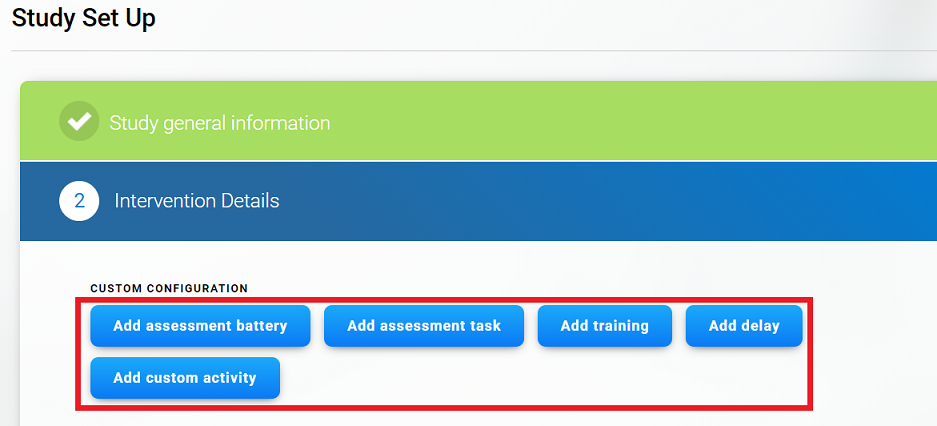
3. Create a design for your study. To do this, choose the intervention you are interested in. You can add as many blocks of each type as you like in any order by clicking on the options “Add assessment battery”, “Add assessment task”, “Add training”, “Add delay” and “Add custom activity”.
Note: Please remember that the study cannot start or end with a “Delay” block.
Note: You will need CogniFit licenses to add assessment batteries and training programs to the study. Learn more about how to purchase licenses on the Researcher Platform.
Specify which assessment, task, or which training program you want to send for each block.
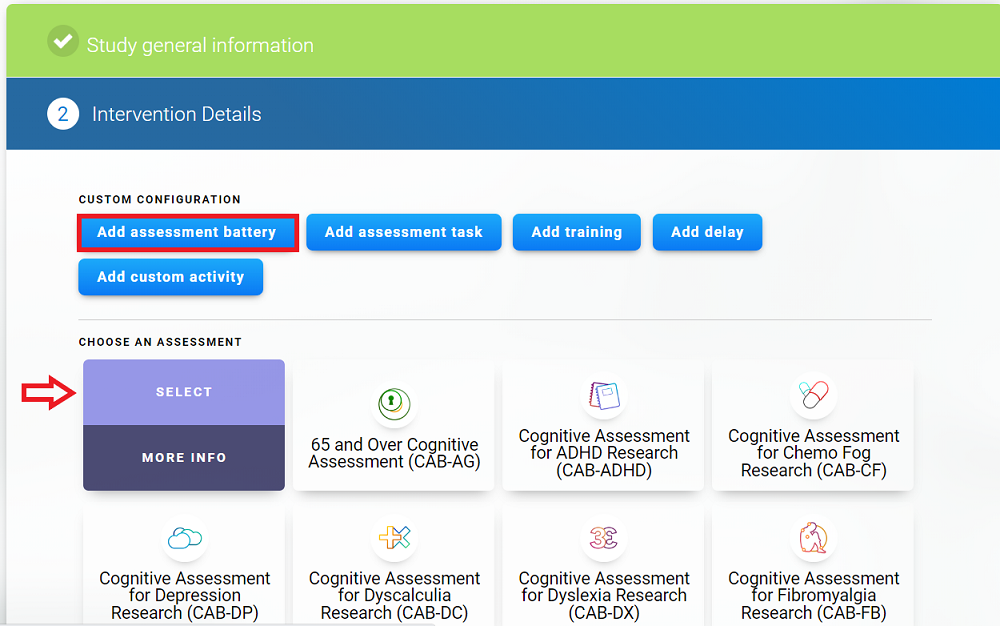
3.1 Add assessment battery.
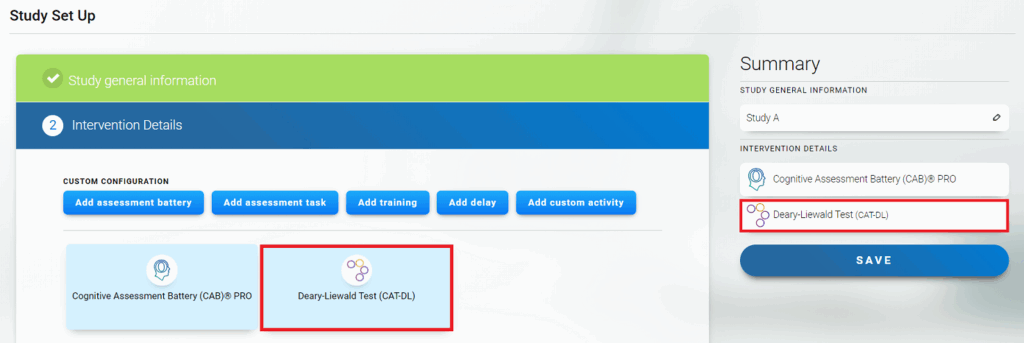
Clicking the “Add Assessment battery” button will show the CogniFit assessments available to add to the study. Select the desired assessment battery and click on “Select”.
The assessment battery will be added to your study.

Note: You can add other assessments to your study. To do this, repeat the steps above by clicking on the “Add assessment battery” button.
Attention: When you click on “Save”, the study design will be finalized. If you want to add other options, include them in the study first before saving the design.
3.2 Add assessment task.
Select the “Add assessment task” option to add to the study. Choose a task and click on “Select”.
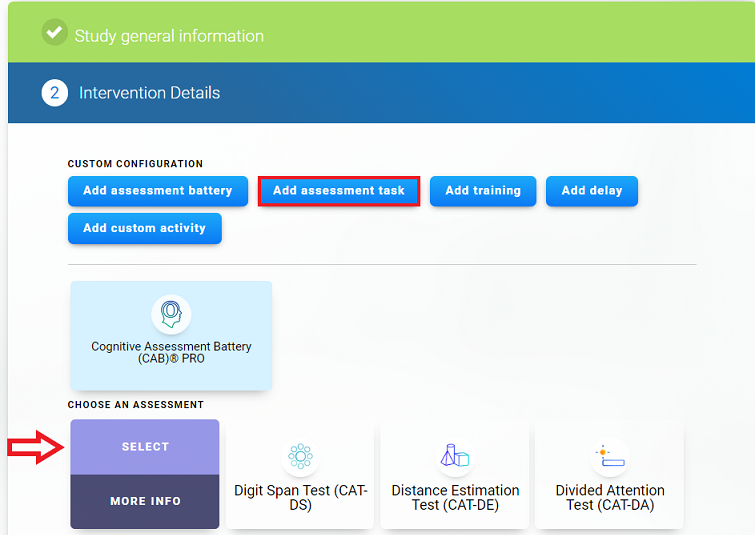
The assessment task will be added to your study.
Note: You can add other assessment task to your study. To do this, repeat the steps above by clicking on the “Add assessment task” button.
Attention: When you click on “Save”, the study design will be finalized. If you want to add other options, include them in the study first before saving the design.
3.3 Add training.
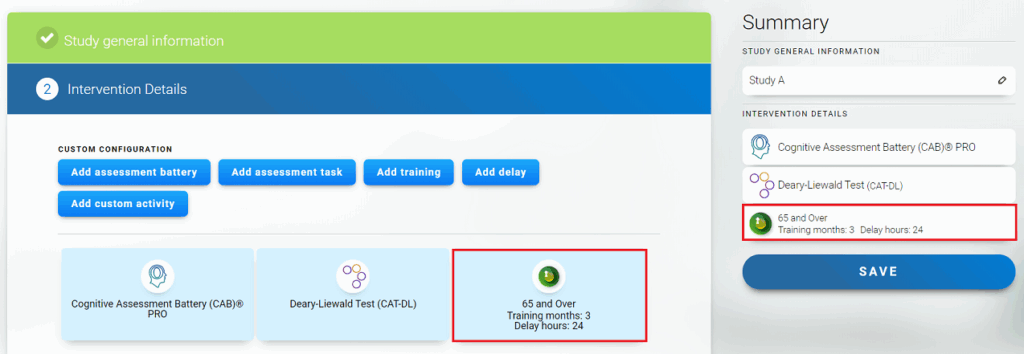
To add a training program to your study, click “Add training” button and select the desired product by clicking on “Select”.
Note: You can also choose the duration of the training program and the delay between training sessions. To do this, select the desired options from the drop-down menu.
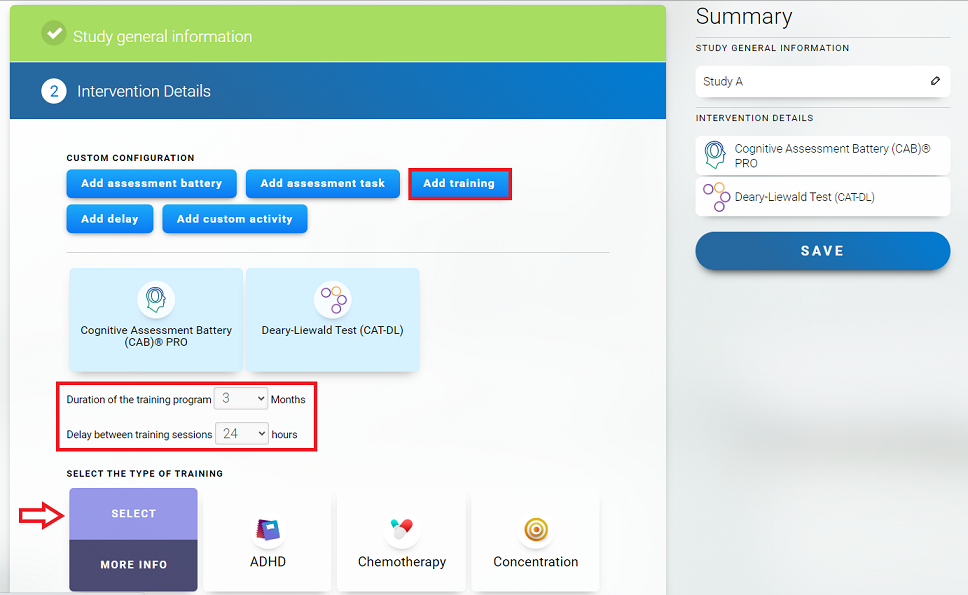
The selected training will be added to your study.
Note: You can add other training program to your study. To do this, repeat the steps above by clicking on the “Add training” button.
Attention: When you click on “Save”, the study design will be finalized. If you want to add other options, include them in the study first before saving the design.
3.4 Add delay
Delays are a convenient way to sequence the activities to be viewed by the user. This is especially useful if you want to dose messages or activities over hours, days or even months. For example, it would be very useful for follow up sessions after 6 or 12 months after an intervention.
Add delays by clicking on the “Add delay” blue button. Select the desired period and confirm your choice by clicking “Add delay” at the bottom of the screen.

After these steps, the delay will be added to you study.
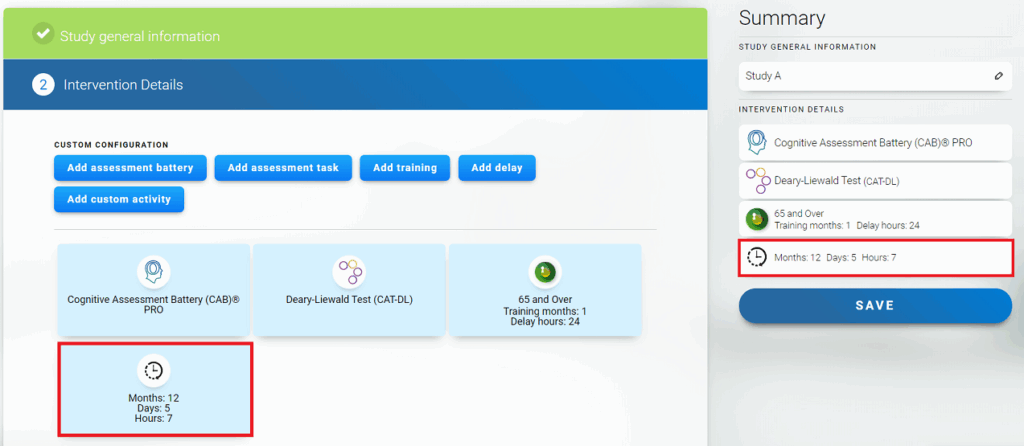
Note: You can add as many delays to your study as you want. To do this, repeat the steps above by clicking on the “Add delay” button. Please remember that the study cannot start or end with a “Delay” block.
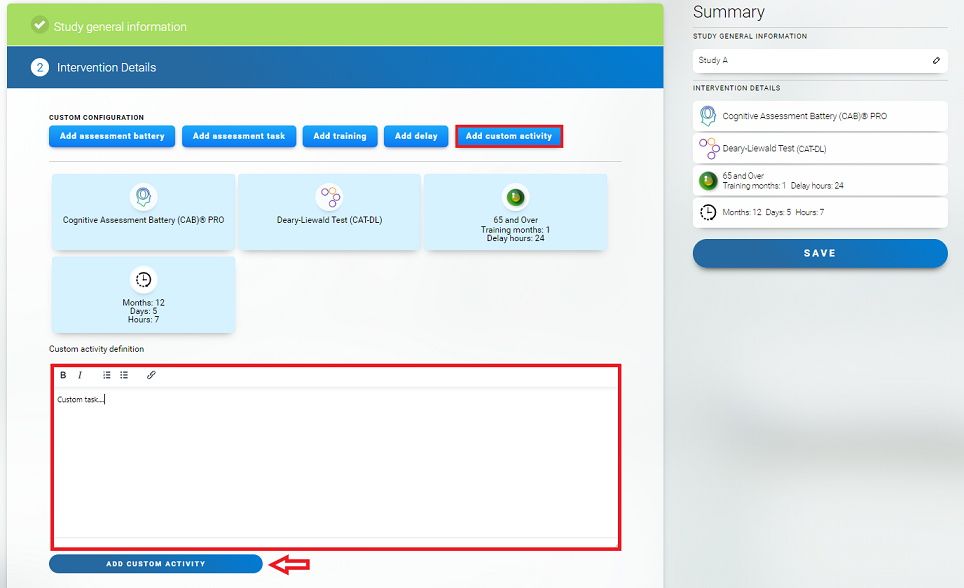
3.5 Add custom activity.
By clicking on the “Add custom activity” blue button you can add to your study a Custom Task. A Custom Task is a text box that allows you to add instructions and links for your participants. This is useful if you want to give instructions to your participants about what to do, if you want to apply an external questionnaire, if you want to add an appointment to an event, etc. It is designed so that you can integrate your external tools into the flow of the platform.
Add the required information and click the “Add Custom Activity” button at the bottom of the screen.
After these steps, the custom task will be added to the study.
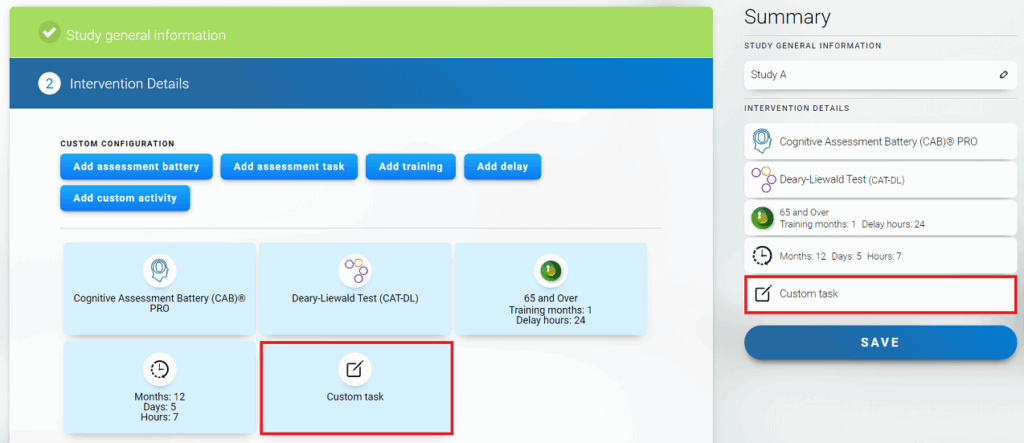
Note: You can add as many custom tasks to your study as you want. To do this, repeat the steps above by clicking on the “Add custom task” button.
Attention: When you click on “Save”, the study design will be finalized. If you want to add other options, include them in the study first before saving the design.
Note: You can always modify your study by editing or deleting blocks and moving their position in the study design, as long as the study is not running.
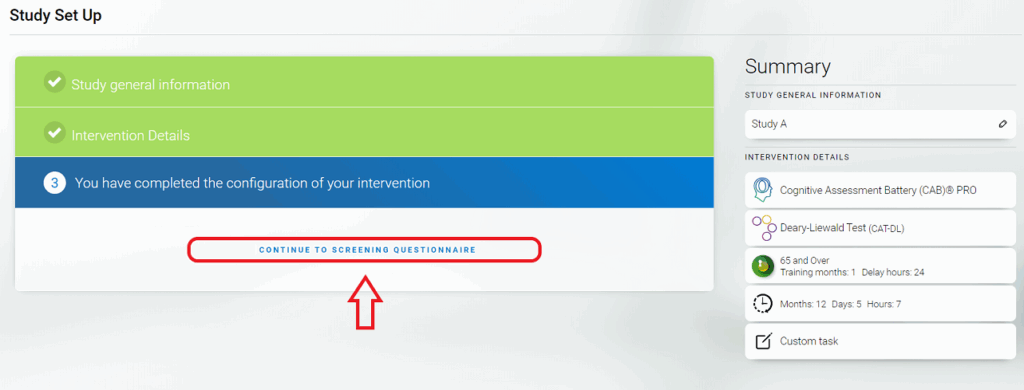
3.6 Confirm your study design by clicking on the “Save” button.

Congratulations! You have completed the design of your study.
4. Click on “Continue to screening questionnaire“.
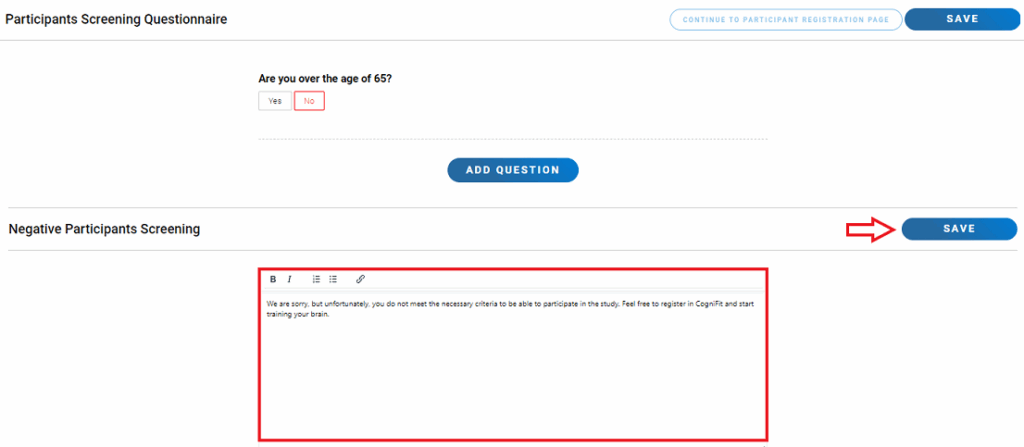
If you want to make sure that your participants meet certain characteristics (such as being of legal age, having a diagnosis or something similar), you can add admission questions. To do this, click on “Add question”.
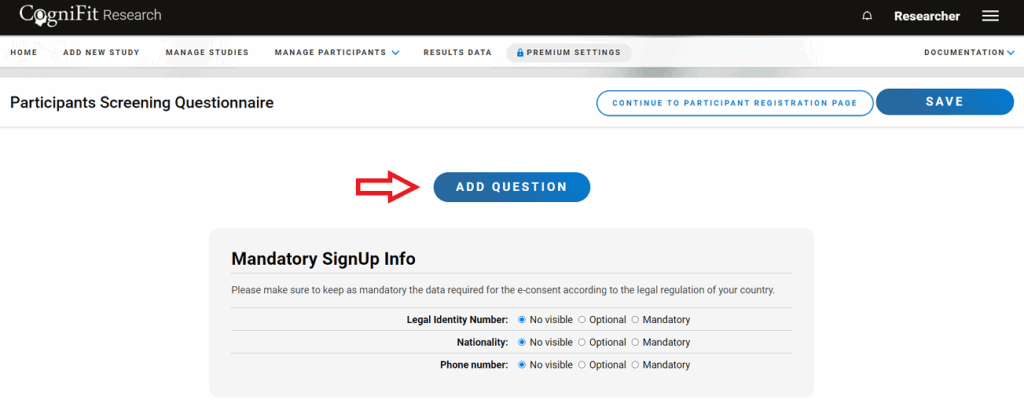
Type in the question, the possible answers, tick the one you want to be the exclusion answer (you can personalize the exclusion text so you can redirect them to a different study) and add more questions or click directly on “Accept”.

Note: You can also edit the text message that a candidate will receive if he or she is not eligible for the study. Write the message and click the “Save” button.
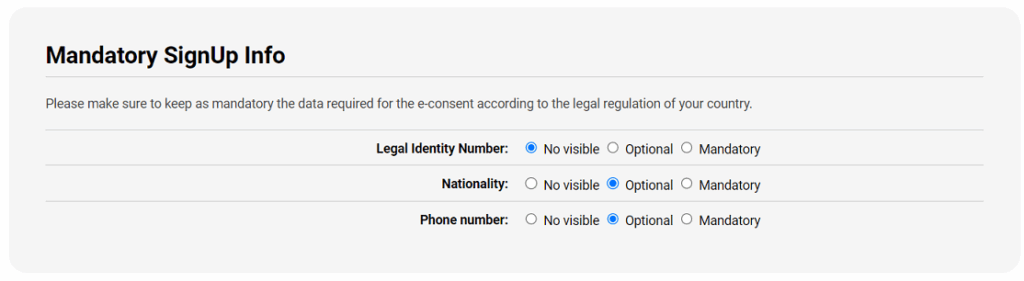
If you have finished adding questions, or if you do not want to add questions at all, you can now make mandatory, optional or not visible at all the following three fields during the sign up: nationality, legal ID number, and phone number.
Once you are done, click on “Save” and then on “Continue to participant registration page”.

5. Create a Participant registration page.
Here you will be able to create a landing page with a custom URL that you can provide to participants to enroll in your study. Here you can choose the name of the study that participants will see, change the exclusivity settings, decide if you want to use the built-in e-consent that CogniFit offers, specify the email to which you want to receive participants’ e-consent, a URL to share (you can even convert it to a QR code and print it), a description of the study, an image, a participant bonus, an ethics committee, consent to participate, basic data protection information, contact information, and voluntary participation. We suggest default texts, but be sure to pay attention to the words in bold. Also, if you want to delete any section, simply leave it blank. Once you have done this, scroll to the top of the page and click “Save” and then “Continue”.

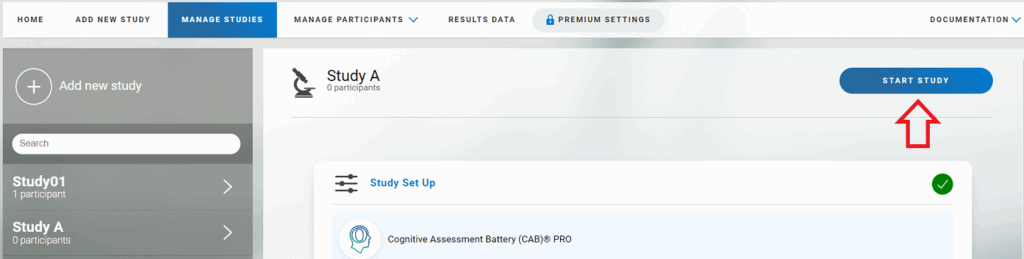
6. Start your study
Once you have completed these steps, you will be taken to the study management page.
In this tab you will see all the studies you have created, be able to edit them (as long as they are not running), etc. To start a study, simply click on your study, click the “Start Study” button.
Note: You can always edit your study later by editing or deleting blocks and moving their position in the study design as long as the study is not running.
Next, enter the number of participants you estimate will take part in the study.
Note: Make sure you have enough licenses to start the study. How to purchase licenses on the researcher platform. You may enter more participants than you originally envisioned for your study, in this case the platform will prompt you to purchase them at this step, otherwise the additional participants will not be able to participate in the study.

If you have enough licenses, simply enter the number of participants and click on “Save”.

Congratulations, you’ve started your study! Now you can proceed to inviting participants and registering them on the platform.
If you have any questions you can contact our support team by sending an email to support@cognifit.com