Once you have purchased assessment licenses and/or monthly training licenses, you are ready to add students to your account and select their intervention in a few clicks.
This video will teach you how to add students to your account.
Read this article for a step-by-step tutorial to guide you through the process.
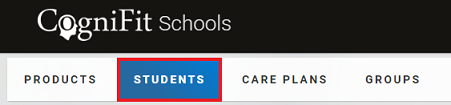
1. Go to the students page
Log into your CogniFit account and click on the “Students” tab at the top
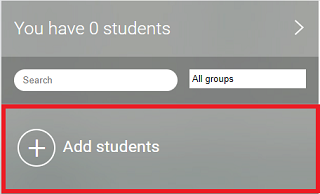
2. Click on the “Add students” option
3. Entering students information
After clicking on Add Students, you will see the following screen:
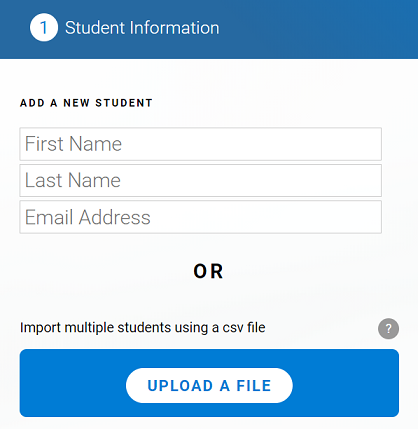
The educator will have multiple options for how to add students to the platform: They can import a list of students through a CSV file, or they may add one or multiple students manually.
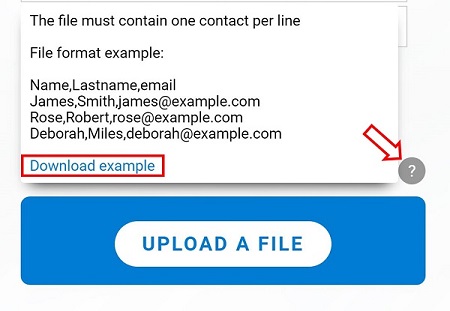
3.1 If the educator wants to upload a file with a list of students in CSV format, they should click on Upload a File. The system will ask them to select a file from their computer and it will be uploaded to the platform.
Please Note: The spreadsheet should have one contact per line. For more information or to download an example, the educator can click on the question mark icon.
Learn more about how to import your student database in this video.
3.2 If the educator wishes to add a single student, they should introduce the student’s details and click Continue.
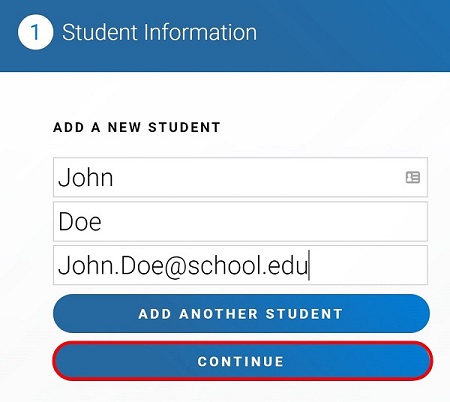
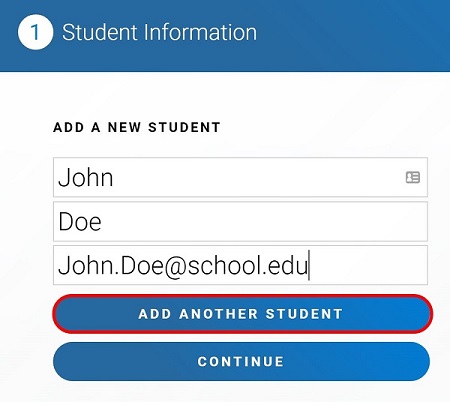
3.3 If the educator wants to add multiple students, they should enter the details of the first student and click Add Another Student. This process should may be repeated until the educator has added all students. When complete, press Continue.
Please Note: With this option all students will be assigned the same intervention type and details. If you want to personalize the intervention you need to add the students one by one as shown in the previous step.
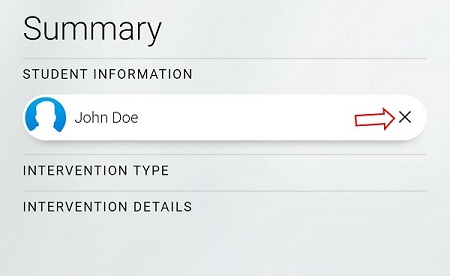
3.4 The educator can remove a student even after clicking on the Continue button.
Simply click on the “X” near the student’s name and continue.
Why does CogniFit ask for students’ email addresses?
If students would use your School account to complete their intervention, they would see other students’ results. To avoid this privacy breach, students need their own access by signing up for CogniFit. An email address is a unique identifier and the best way to link your School account with your students which allows you to receive the results of their interventions.
For privacy reasons, you can use fake email addresses. In that case, students will not be able to reset their password on their own. For more information please contact us at support@cognifit.com
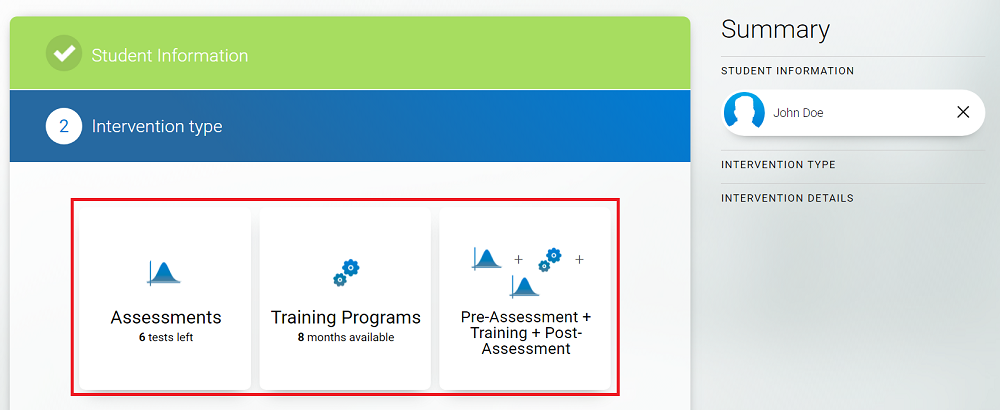
4. Choose the type of intervention
5. Choose the intervention details
5.1 If you selected the assessment intervention.
Choose the type of assessment you would like the student to complete.
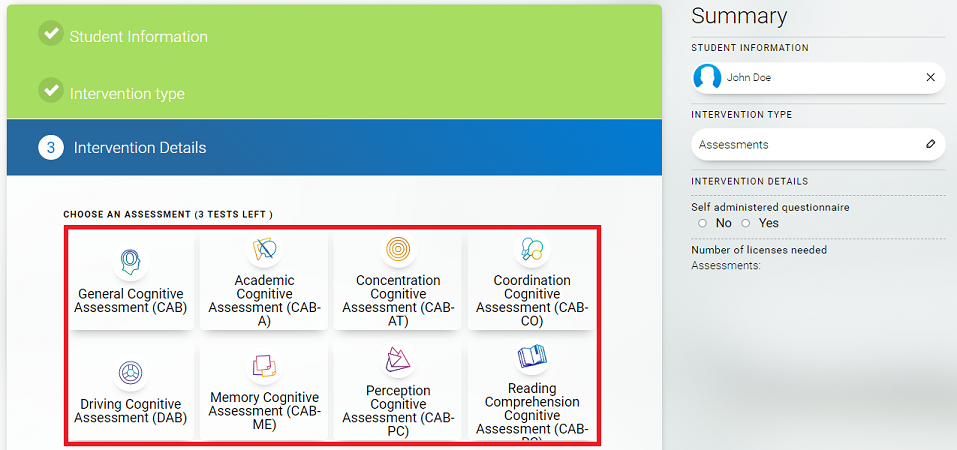
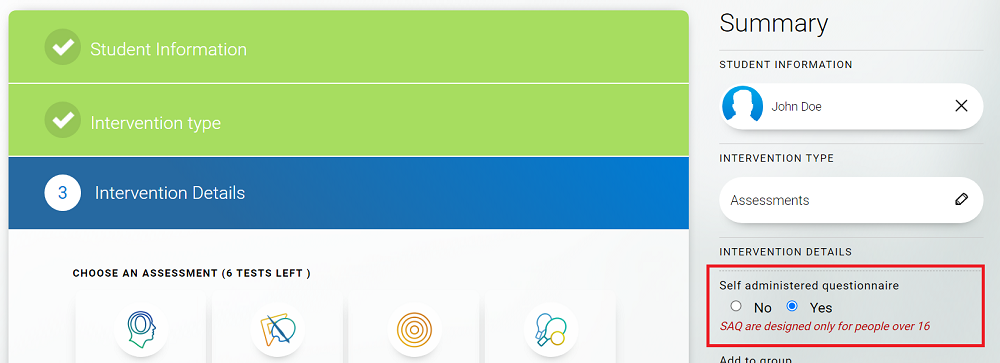
Note that all of the assessments start with a questionnaire. If you would like to complete the questionnaire yourself, and not the student, click on the “no” option in the “self-administered questionnaire” area.
Attention, the self-administered questionnaire option is not available for students under 16 years old.
5.2 If you selected the training intervention.
Choose the type of training program you would like the student to complete.
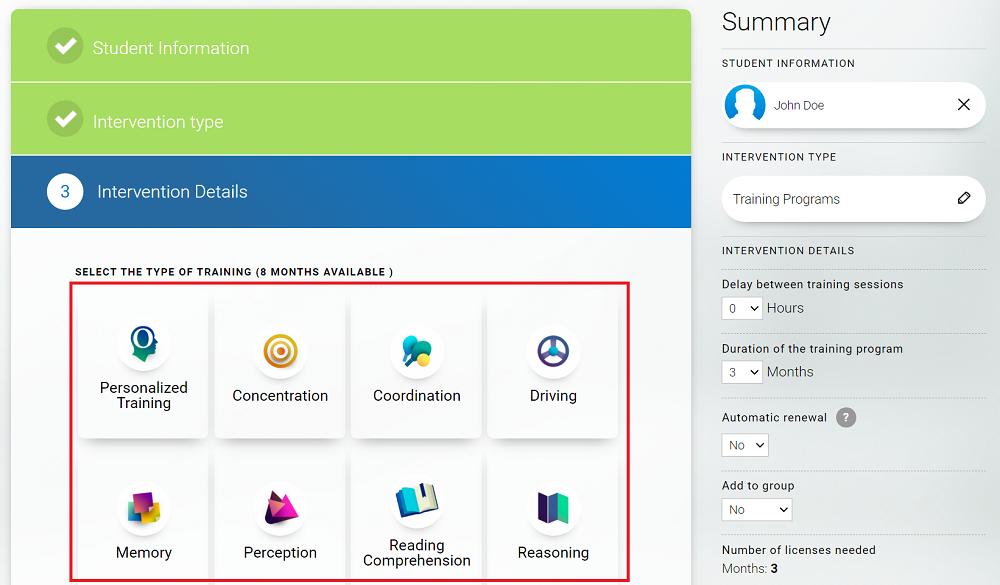
You can customize the training regimen with the following options:
- Delay between training sessions: You can block students from completing several training sessions in a row. For example, if you wish students to train only when at your class, set a delay of 24 hours in between training sessions. If you would like students to train as many times as they want, do not block them by setting no delay between training sessions (0 hour delay option). There is no difference in pricing whether you add a delay between training sessions or not
- Duration of the training program: During this training period, students will have access to the training regimen you customized for them. All of our peer-reviewed publications show that people start seeing some benefits after 3 months on average, if they complete at least one training session every other day.
- Automatic renewal: If you wish the students to automatically continue with another training period. The most flexible combination is to set a one-month training period with auto-renewal.

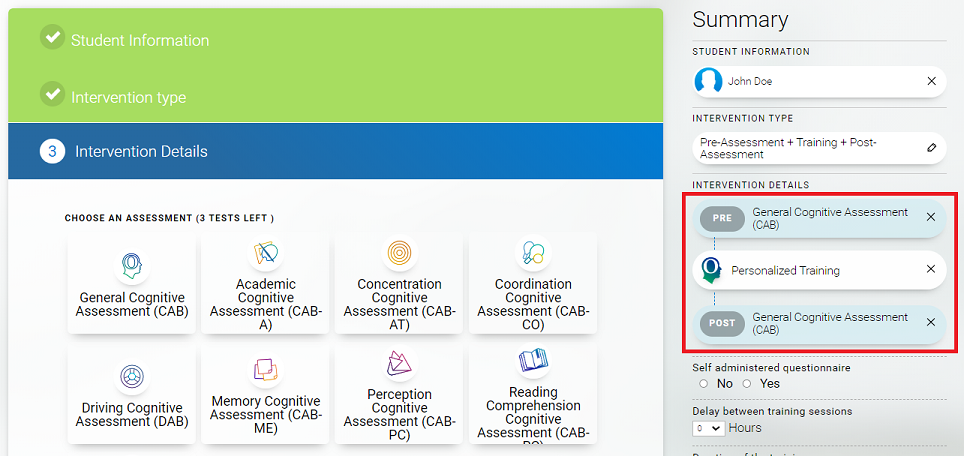
5.3 You can also set a pre- and post- assessment intervention so that you can formally track how much progress students make after the full training period.
Please note that the pre-assessment and post-assessment are parallel forms of the same assessment type.
Choose the type of assessment and training program you would like the student to complete.
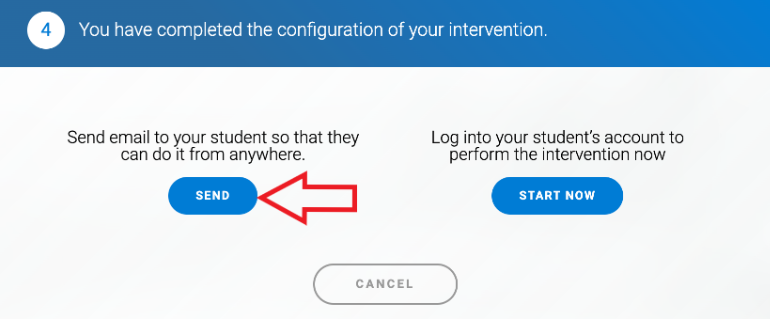
6. Click the “continue” button
At the last steps your student can create their own account or you can create it for them.
6.1 If you click on the “Send” button, an email will be sent to your student with a link. When the student clicks on the link they can register their own account with CogniFit and start their intervention.
Please note that if the student hasn’t received the email it can also be in the spam or junk folder.
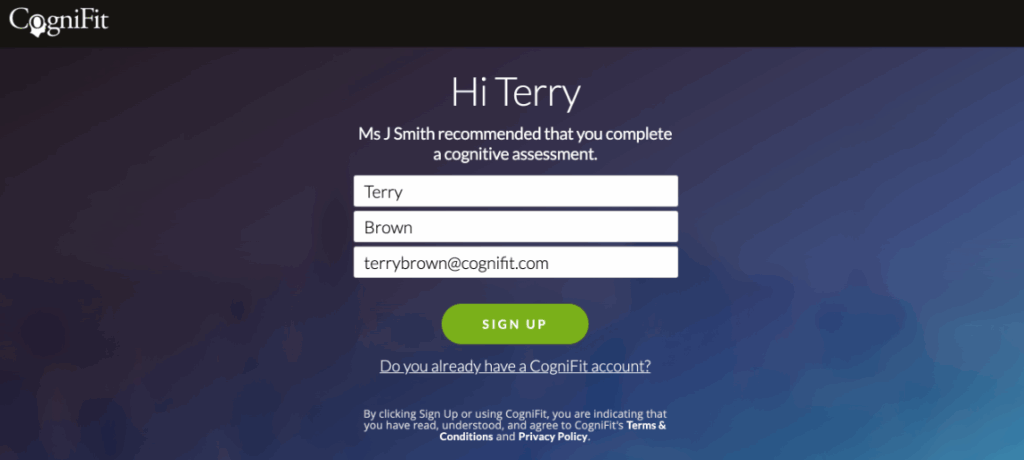
6.2 Or you can click on “Start now” button and create an account on the students behalf which they can use to log into to start their intervention.
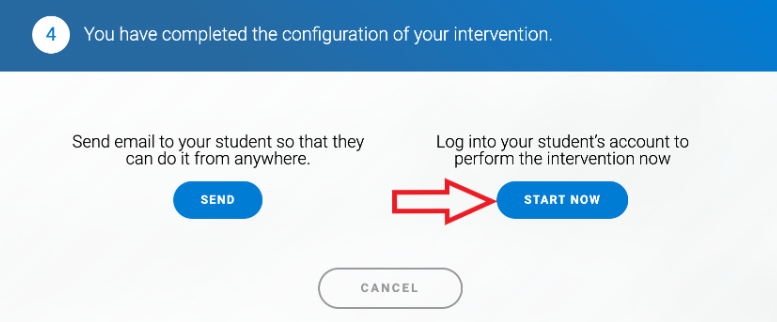
In a new screen you will be able to create the account. Please ensure you use the same email address you used to add the student to your platform to create the link between your accounts which allows you to see the students results.
Questions? Contact us at support@cognifit.com