You can invite a participant to the study in several ways:
- by providing a link to the study’s registration page;
- by sending out an e-mail invitation, adding participants individually or as a whole list;
- by creating a participant account yourself.
This video tutorial will help you through the process:
For more information, read the step-by-step instructions in this article.
1. Share the study link with participants
During the process of creating your study design, you can create a customized URL for your study. Read more about this in section 5 on creating a participant enrollment page in the article “How to Create a Study” .
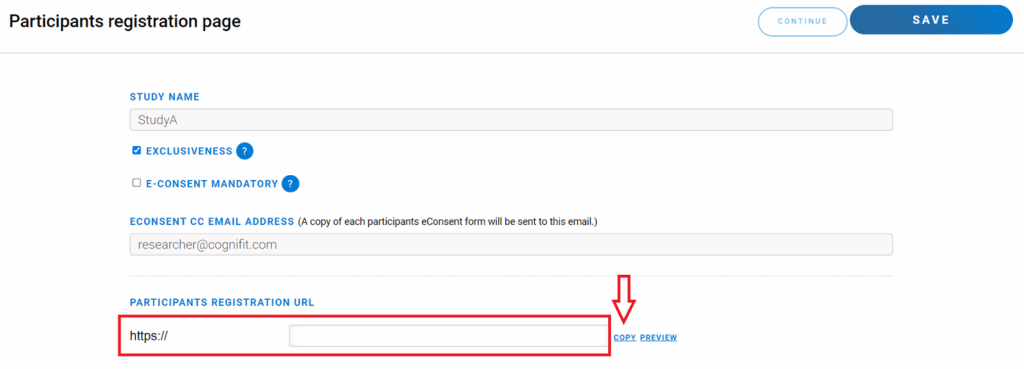
Be sure to copy the created URL to send it to participants, share it on social media, etc. You can also generate a QR code of the study, print it out, and attach it anywhere.
2. Send an invitation
Before you send out invitations to participants, determine who you want to invite to participate in your study. You can invite new participants individually, in bulk via a CSV file, or invite existing participants who have already been added to the platform before. Let’s take a closer look at these features.
Log in to the home page of your account. Go to the participants page by clicking the blue “Manage Participants” button or the “Participants” option in the drop-down menu of the same name.
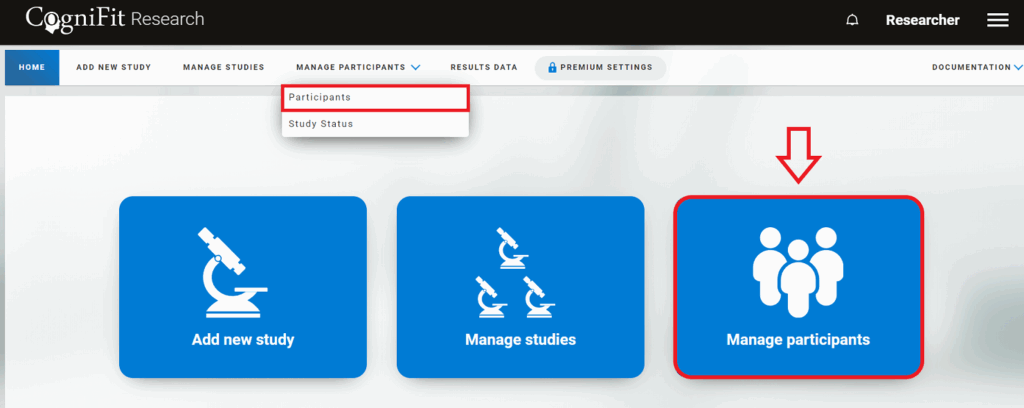
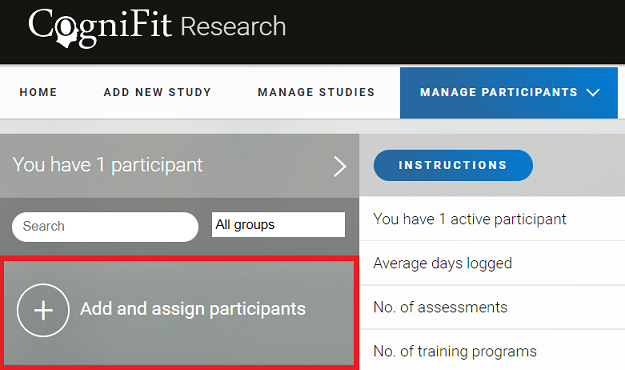
You will be taken to the participants page. Select the “Add and assign participants” option.
2.1 Invite new participants individually
Enter the participant’s first name, last name, and e-mail address (it cannot be the same as your research account email).
Note: Each participant must have their own email address in order to participate in your study. You won’t be able to invite participants who are already participating in an exclusive study, or in a different study if you set your study as exclusive. You won’t be able to invite professional users.
You can optionally provide either the participant’s real first and last name or, to maintain anonymity, add a pseudonym or participant number.
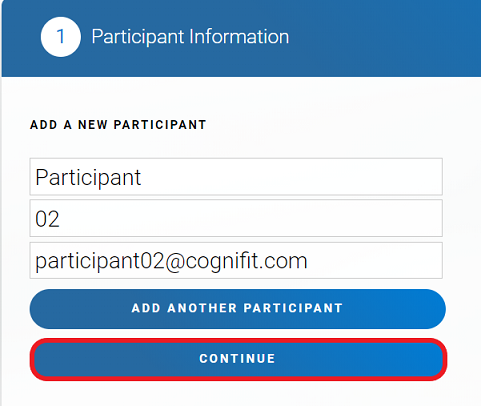
Note: If the researcher wants to add more than one participant, the researcher must enter the details of the first participant and click the “Add another participant” button. This process can be repeated until the researcher has added all participants. When finished, click the “Continue” button.
Next, add the participant to the study by following the instructions in subsection 2.4 of this article.
2.2 Invite new participants in bulk
This video will teach you how to add your participant database to the CogniFit research platform:
Let’s go over it again.
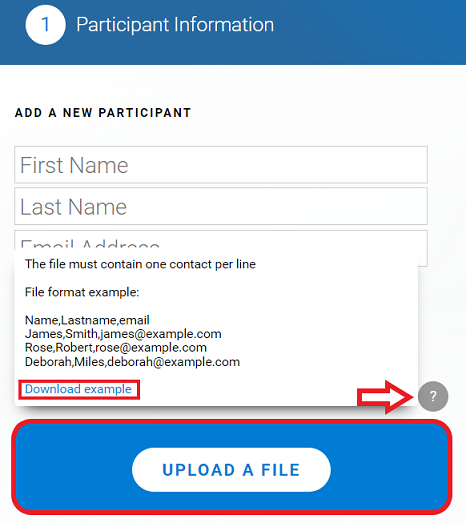
If the researcher wants to upload a file with a list of participants in CSV format, they should click on “Upload a File”. The system will ask them to select a file from their computer and it will be uploaded to the platform.
We recommend using the CSV list to add participants to the same study. You can also use the CSV list to add your entire user database to the platform without assigning them to studies. You can always add each participant to a study later in their personal profile (see subsection 2.4 of this article).
Note: The spreadsheet should have one participant per line. For more information or to download an example, the researcher can click on the question mark icon.
Next, add participants to the study by following the instructions in subsection 2.4 of this article.
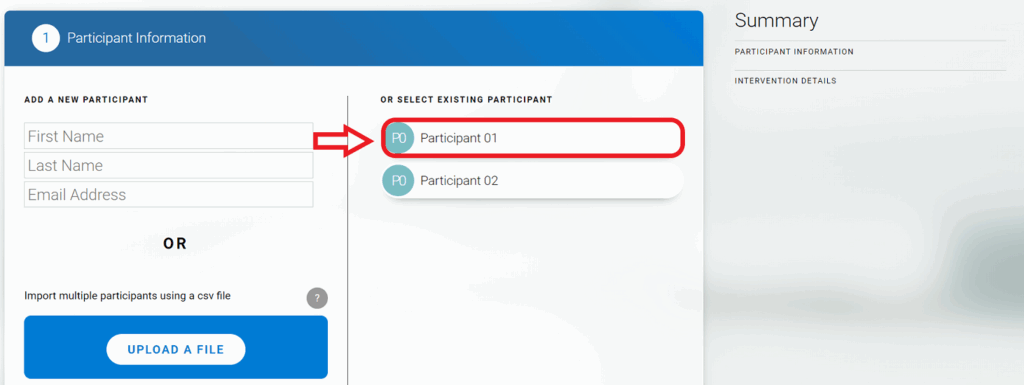
2.3 Invite existing participants
You can also invite participants who have already been added to the platform before. To do this, simply select the desired user from the list of participants. To do this, also click on the “Add add assign participants” option in the “Manage Participants” section.

And then instead of adding new participants, just choose from the list of already existing participants. You can add one participant or several.
Note: Please note that you will not be able to invite a participant to a new study if they are already participating in another exclusive study.
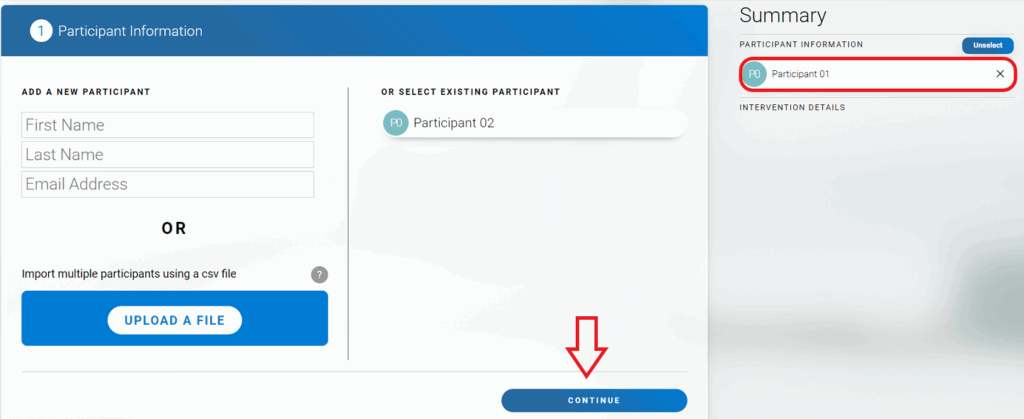
The participant’s name will appear on the right side of the Summary. Then click “Сontinue”.
Then follow the steps in subsection 2.4
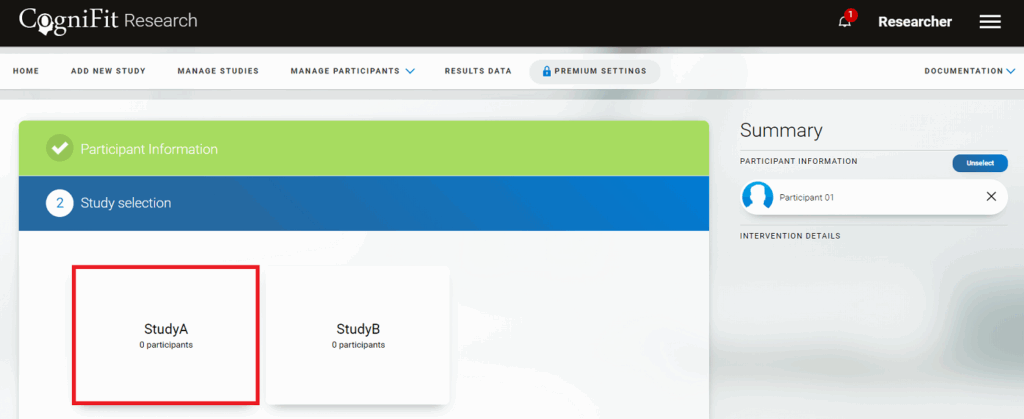
2.4 Decide which of the existing studies to invite participants to
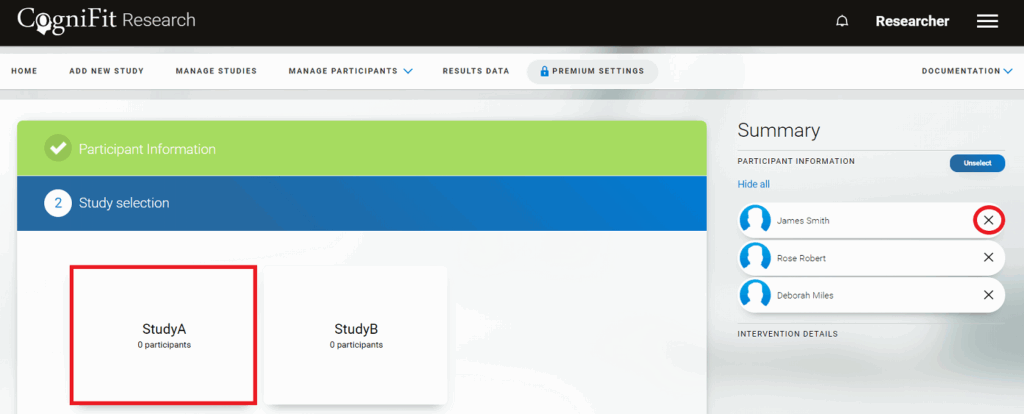
After adding a participant, click on the study in which they will participate.
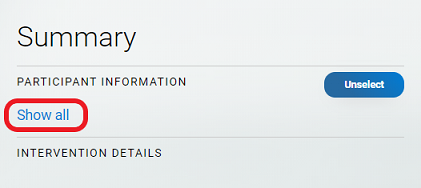
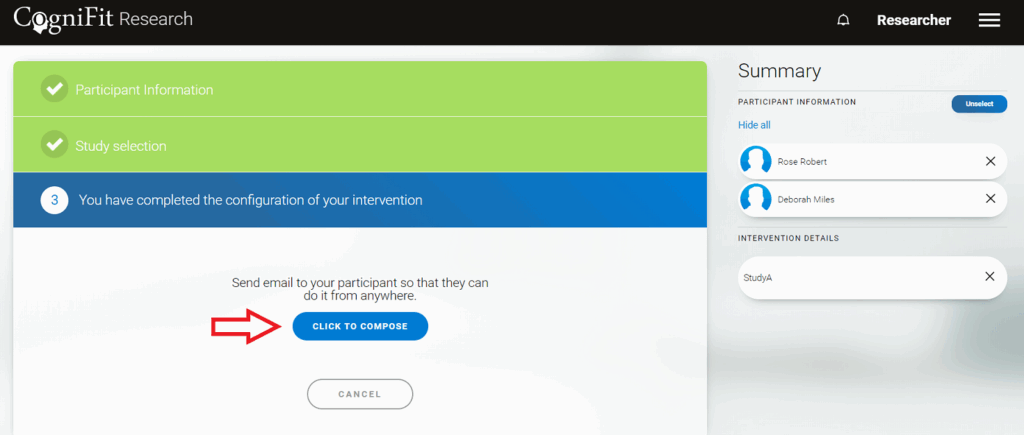
If you have added members as a list, all members will be displayed on the right (click on “Show all” to see the list).
If you wish, you can delete a user by clicking on the “x” to the right of their name. After that, select the desired study.
Attention: If you click the “Unselect” option, your choice of participants will be canceled completely.
Note: You can always add participants to the study later if they are already registered on the platform and are not participating in another exclusive study by following the steps in subsection 2.3 of this article.
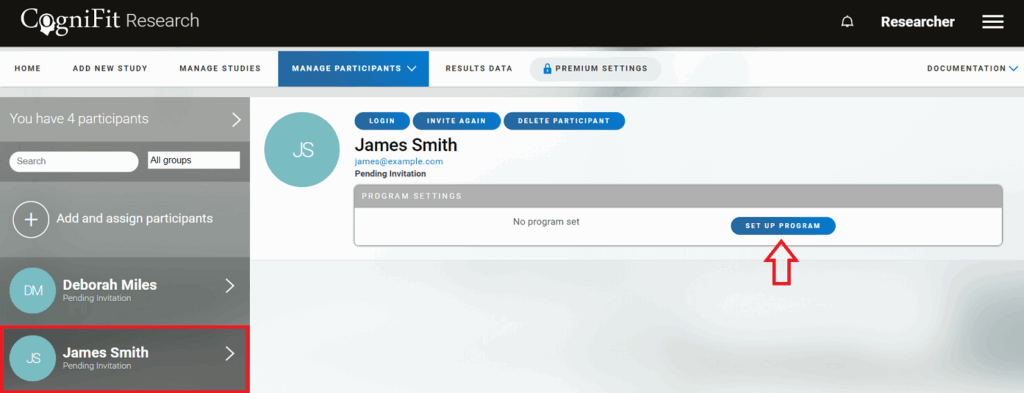
In addition, you can add a participant to the study from their profile. To do this, go to the participants page, click on the name of the participant and then select the “Set up program” option.
Next, you will be taken to the page for selecting the study in which the user will participate.
Attention: You can add new participants at any time, even after the study has started. Moreover, the platform allows you to exceed the expected number of participants if you have enough licenses to do so. You can read how to purchase licenses on the research platform here.
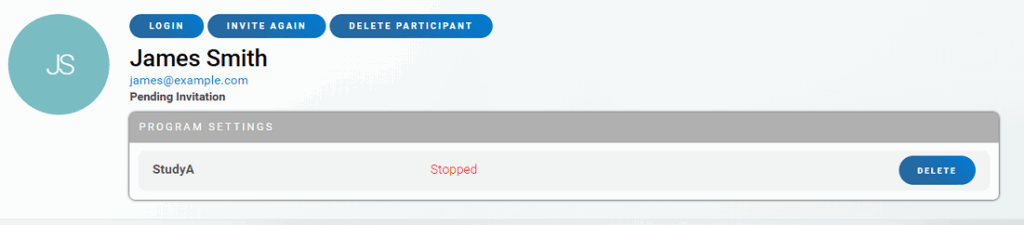
In each user’s profile on the participant management page, you can always see which study they are participating in.
2.5 Decide how to send the invitation
If you are adding a new participant to the platform, you will be offered 2 options after the study selection step: you can send an invitation to the participant by e-mail or create a participant account yourself.
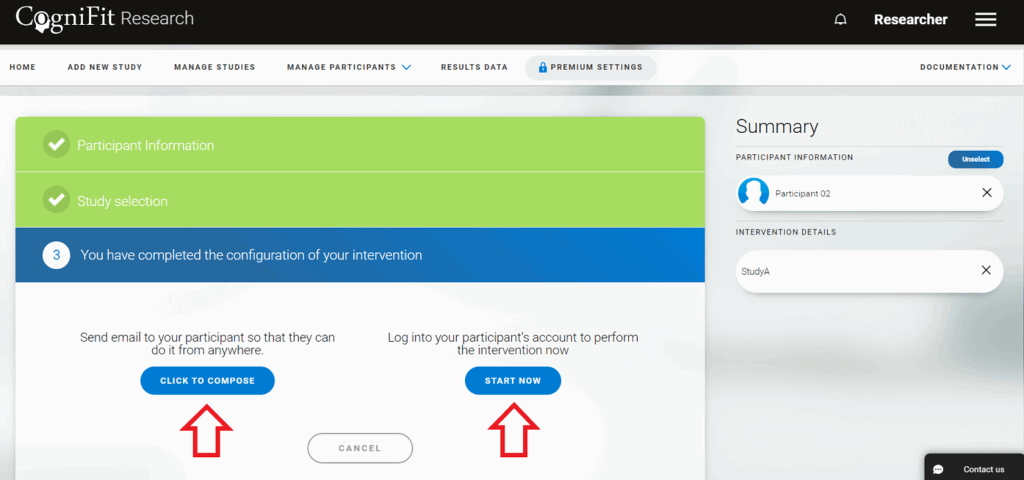
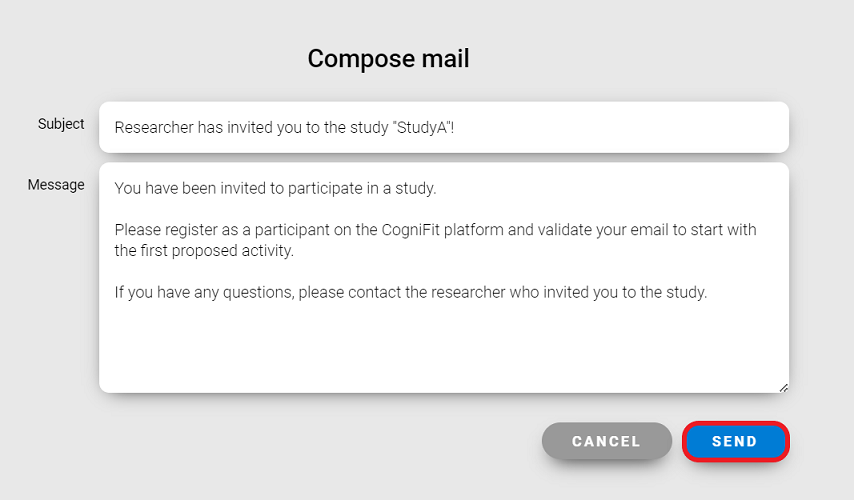
- Compose and send an invitation email
Clicking on the “Click to compose” blue button will take you to a page where you can edit the message the participant will receive via email. Click “Send” to finish.
- Register a member account by yourself
You as a researcher can also register a participant on your own. Clicking the “Start now” button will take you to the participant registration page.
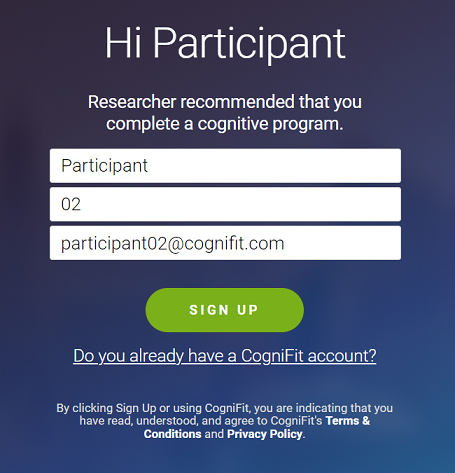
To complete the registration, click on the “Sign up” button and follow the instructions on the plaflorm.
Attention: If a researcher registers a participant on their own, make sure that the participant has all the information (email address, password…) to access their account.
Note: If you added new study participants using the CSV list (as well as when adding to the study participants already registered on the platform), once you select a study, you will only be able to send an email invitation to all participants.
Congratulations! You have invited participants into your study.
You can read more about how study participants can sign up for the CogniFit platform in this article.
If you have any questions you can contact our support team by sending an email to support@cognifit.com